To continue our tutorial series, we’re going to move on to the night of the event. For this series, you’ll need to know how to add new guests and add items for your auction. To schedule your MyGala training session, please contact us. Now, without further ado, here are the steps.
- Go to the MyGala volunteer area
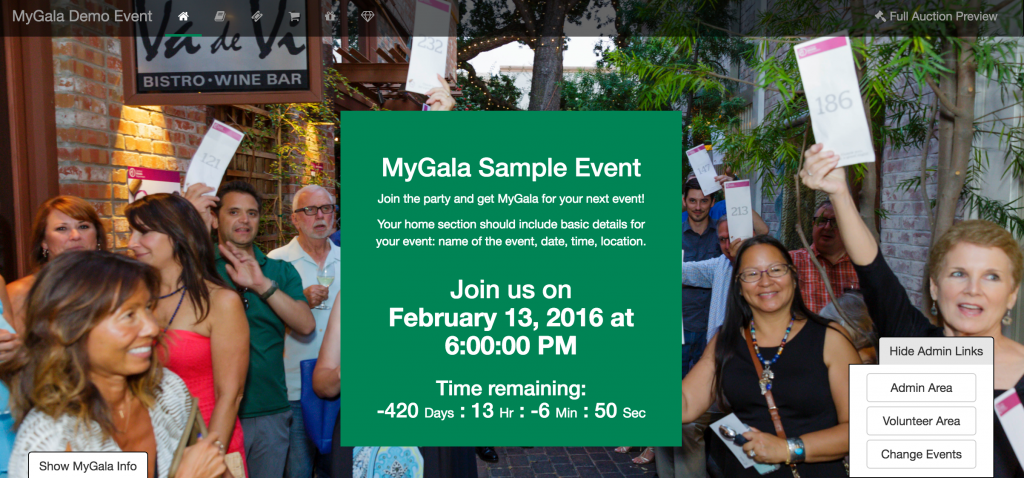
You can access the MyGala volunteer area in two ways. If you’re on your event landing page, click on the bottom right corner where it says: “Show admin links” and click on “Volunteer area”
If you’re on the admin page, click on the red button in the top right corner and click “Open Event Landing Page”
- Go to the Check-in area
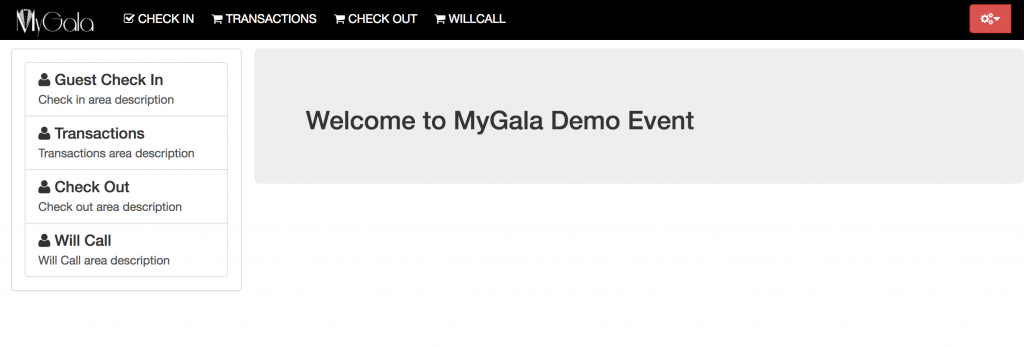
From the volunteer landing page, click on “Guest check-in” on the left menu or “check-in” from the top navigation menu.
- Search for a guest
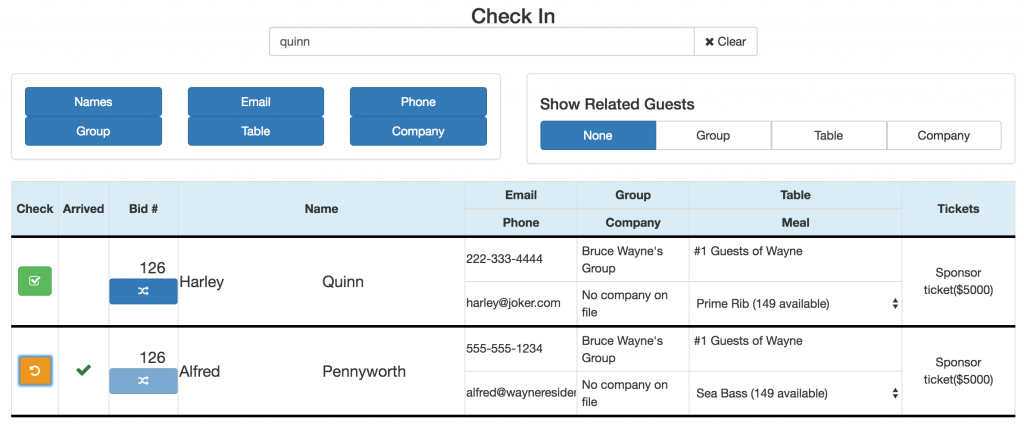
The check-in area lets your search for a guest directly by name, phone number, email, or company name. Note: you will receive multiple results if your guest is part of a group. The groups function will be explained in depth during your training session. In this example, we searched for Harley Quinn by typing in her last name. Her date happens to be Alfred Pennyworth and they share a bid number, so whenever you search for Harley, Alfred will automatically pop up. You can show related guests by selecting the group (she belongs to Bruce Wayne’s group), table (she is seated at the “Guests of Wayne” table), or company (she does not have a company listed) buttons in the “Show related guests” section.Please note that for some guests, your results may include multiple pages. You can filter your results by deselecting any of the contact details on the left. For example, if you want to search by email only, deselect the other buttons. If they have been assigned to a particular table, you will be able to see all the guests seated at their table.
- Check-in guests
Once you’ve found your guest(s), look at the column that says “Check” on the far left. If the guest has a green checkbox in that column (like Harley Quinn above), they are ready to be checked in. If a guest has a yellow arrow and a check mark on the “Arrived” column (like Alfred Pennyworth above), that means the guest has already been checked in. To check in a guest, simply click on the green button and they will be marked as arrived. If you accidentally checked someone in, simply click on the yellow arrow to un-check them in. You can check-in all guests in a group at one time. When you’re done with the guests in a particular group, click the “clear” button to the right of the search box and you’re ready to check in a new guest. - Editing Guest Details
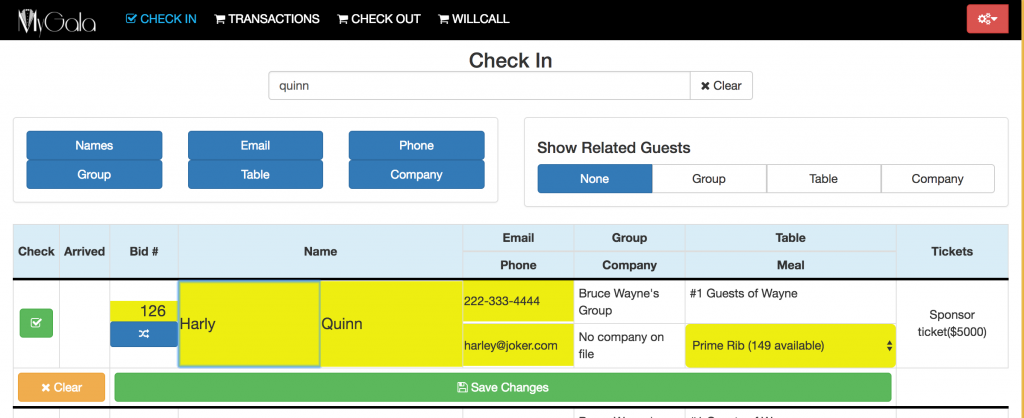
Before you check in a guest, make sure to confirm their contact details are correct – especially their email address and phone number. We ask for email addresses because that is how a guest receives a receipt for purchases at the end of the evening. A phone number is good to have in case someone leaves without paying their bill or leaves their items. MyGala will never disclose these contact details to a third party. Lastly, the system will not allow you to check in a guest if they do not have a bid number. You can click on the blue double arrow button to assign a new bid number if that field is blank, or you can manually edit the number. The fields highlighted in yellow below are the fields you can edit during check-in. To edit any of these fields, simply click on the box and type in the changes, then click save changes. Other fields, such as changing a guest’s table assignment must be done in the admin area.
And that is how you check in a guest. As mentioned previously, there are some functions that are restricted in the volunteer area. For example, if a guest wants to register at the door, you can only add a new guest within the admin area. Likewise, if a guest wants to change tables, you will need to do so in the admin area.
We look forward to your feedback and invite you to contact us if you have any questions or suggestions. If you missed our last tutorials, be sure to check out Getting Started with MyGala, Setting up your Event Landing Page, and Ticket Purchases.
